

A constant tribulation for PF members has been the inability to mark their own date of exit upon exiting a company. Honest pleas to the employer for this often fall on deaf ears. And without having the date of exit marked, it is difficult to proceed with further actions on your PF account. Hence, the good folks of EPFO have brought about a fantastic new PF feature. With this new PF feature, it will now be possible to mark your own date of exit without employer! Read on to find out how.
Table of Contents
Conditions for marking the date of exit without employer
It is possible to mark the date of exit without employer under the following two conditions:
- It is not possible if you are a new employee and the company has not given any contributions towards your PF account.
- On the other hand, it is possible if a minimum duration of two months has passed since the last contribution made by the company towards your PF account. Post it, there should not be any contributions to your PF account for two months.
Steps to mark the date of exit without employer
- Visit the EPF member portal.
- Enter your UAN, password and captcha to login to the website.
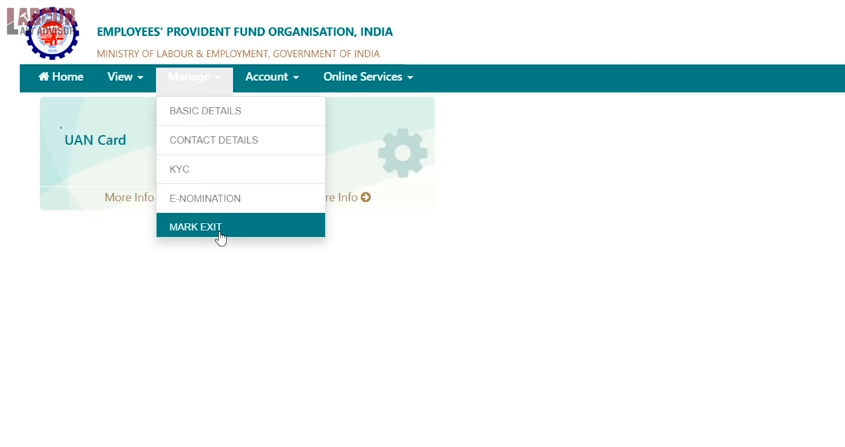
- From the Manage option on the toolbar, select Mark Exit from the drop-down list.
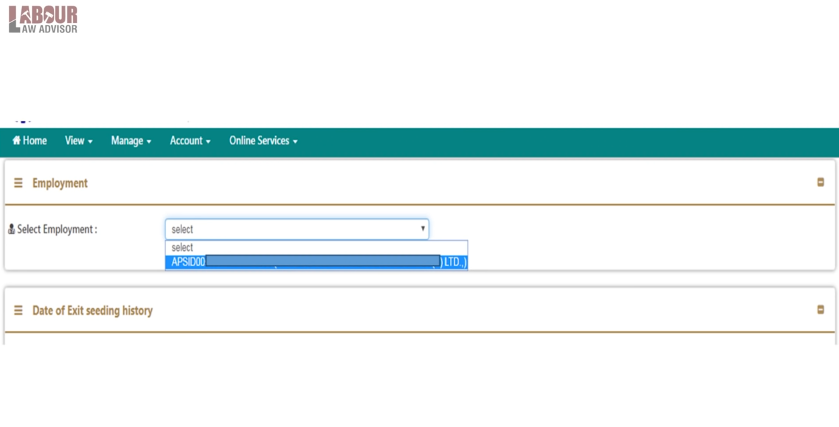
- For the tab Select Employment, choose the company you want to mark the date of exit for. This will be the last company you have been working for.
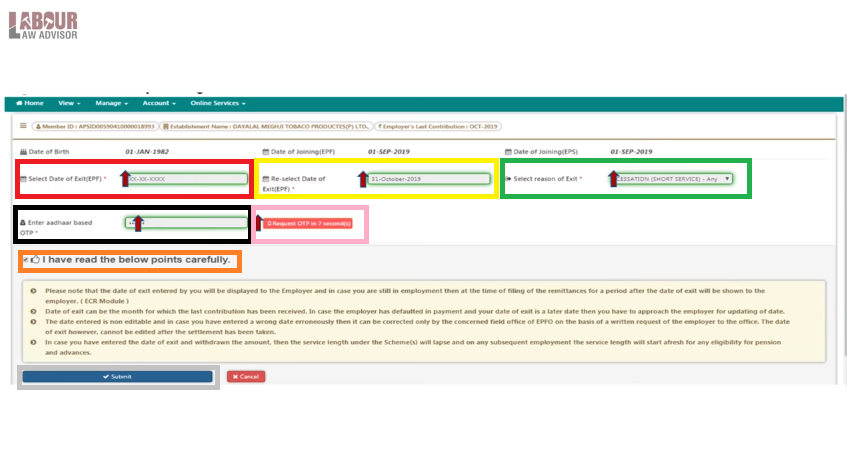
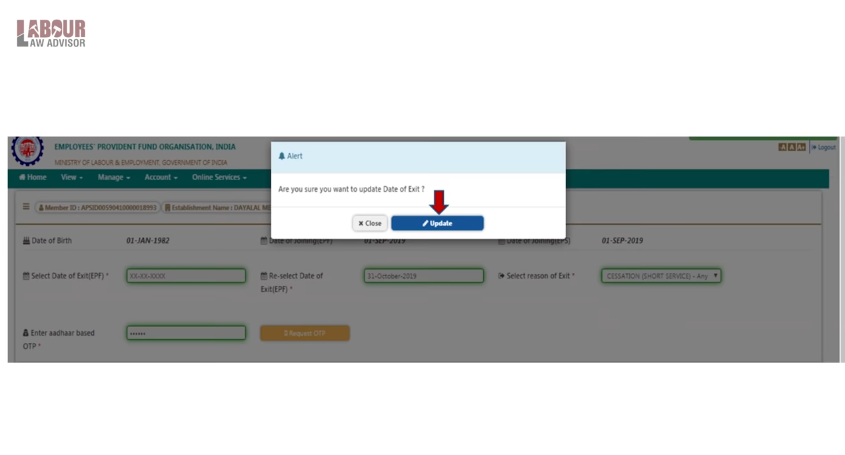
- This opens a new window. Next, mark your date of exit in the red box shown below. Additionally, re-mark your date of exit in the yellow box shown below. And for the green box shown below, input your reason for company exit. This is usually cessation, so you could pick that or any other reason valid in your case.
- Furthermore, enter your Aadhaar number and click on Request for OTP. This will send an OTP to your registered phone number which you need to input here.
- Click on the checkbox for, I have read the below points carefully.
- Head on to click on Submit.
- This will prompt a message, Are you sure you want to update date of exit? Thus, click on Update.
- Then an alert will come showing date of exit updated successfully. Click on OK.
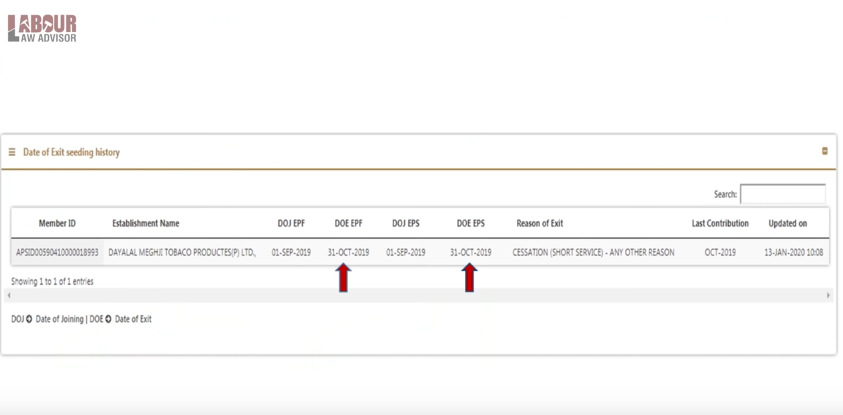
- Now, you can go to View toolbar option and click on Service History. This will show your date of exit marked for all your employments.
- Hence, your process is complete.
Step by step tutorial video
If this was helpful then find more such important updates All EPF, ESI & Labour Law Updates 2019.
Join the LLA telegram group for frequent updates and documents.
Download the telegram group and then search ‘Labour Law Advisor’ or follow the link – t.me/JoinLLA.
It’s FREE!
