

As an employee, it is extremely important to have your EPF KYC details correctly updated on the EPFO online portal. This comes in handy for checking your EPF balance and for transferring or withdrawing your PF while changing jobs. Details such as your name, father’s name, date of birth, which you update on PF employee portal need to be approved by your employer. It is equally important to have your PAN details updated on your PF member portal so you can save TDS deduction on your PF withdrawal. After successful EPF KYC updation by employer, it is then the employer’s duty to approve the KYC details from his/her end. In this article though, we take you through the process of EPF KYC approval on the employers’ portal. This process would require the employer to sign the KYC with their Digital signature.
Table of Contents
Steps for individual employee EPF KYC approval by employer
The most important point to note here is that EPF KYC approval as well as KYC updation (which is done by employee) can also be done by the employer. However, the employees do not get an option to self verify, which is why the employer signs it with his digital signature. Show these steps to your employer for successful EPF KYC approval in under 2 minutes.
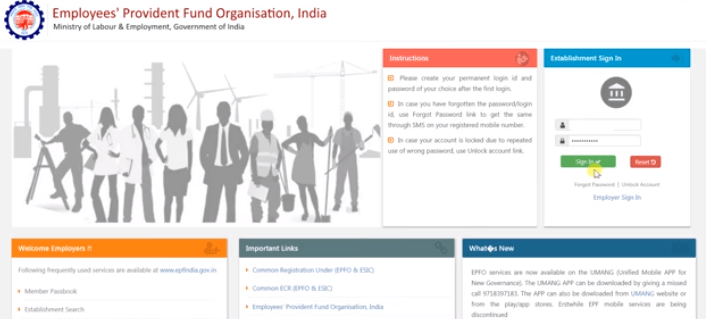
- Log in to the Unified Portal Employer Interface.
- Under ESTABLISHMENT SIGN IN, fill in your USERNAME and PASSWORD, then click on SIGN IN to sign into your account.
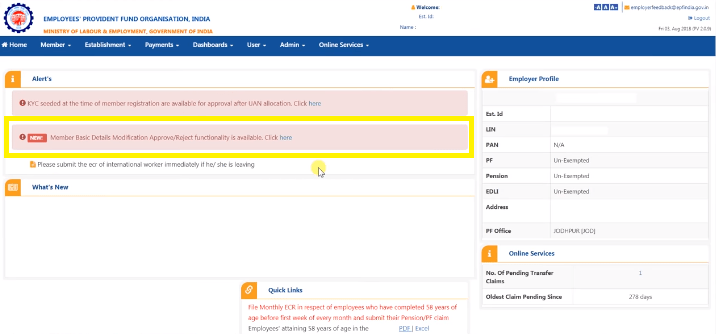
- This will open a new window. You will see a new notification blinking on this page, MEMBER BASIC DETAILS MODIFICATION APPROVE/REJECT FUNCTIONALITY IS AVAILABLE. Click on it.
- A new window will open to show all the details submitted by all the employees for modification on PF portal.
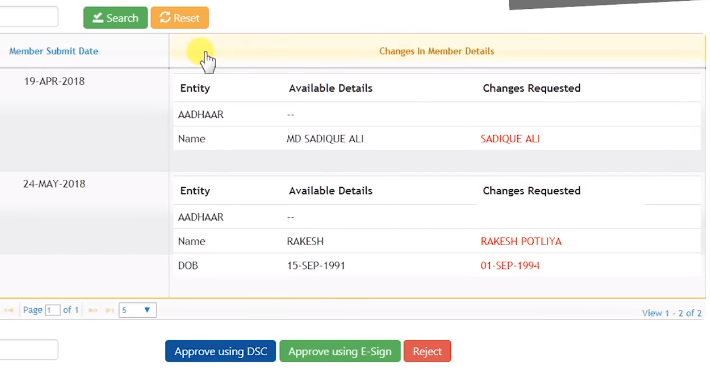
- The employer needs to select all inputs and click on APPROVE USING DSC. A prompt window opens asking for the digital signature password. Input the password and click on APPROVE.
- KYC approval will be complete.
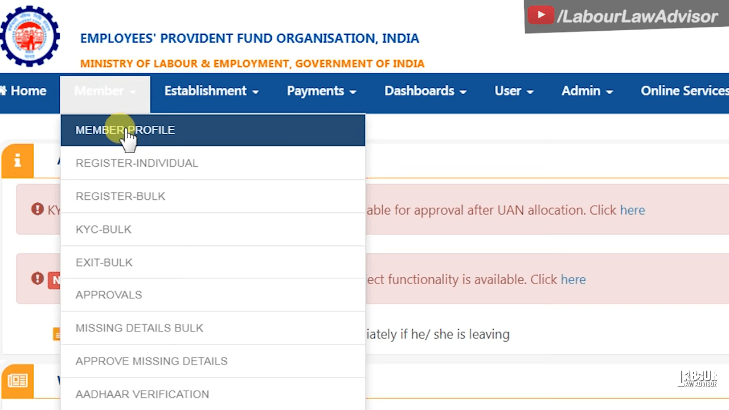
- Another option is going to Member from menu bar and selecting Member Profile from drop-down list.
- Under Search tab, enter UAN number of concerned employee whose KYC approval is pending and click Serach.
- From the below tabs, click on KYC and enter bank, Aadhaar and PAN details in designated rows.
- Click on Save to update individual employee KYC details.

Watch the steps for EPF KYC approval by employer in the video tutorial below.
Steps for Bulk EPF KYC upload by employer
Sometimes, there is a huge number of employees whose KYC updation on PF portal is pending. In this situation, uploading each employee’s KYC individually might be cumbersome and time-consuming for the employer. To ease the employer’s work, EPF website has the option of bulk KYC approval.
Finding missing employee details
- Login to EPF employer portal.
- Under Establishment Sign In, enter your Username and Password and click on Sign In. From the menu bar, click on Dashboards and select Missing Details from the drop-down list.
- The next page will show ten parameters for searching. Only select the checkboxes for Aadhaar KYC, PAN KYC and Bank KYC.
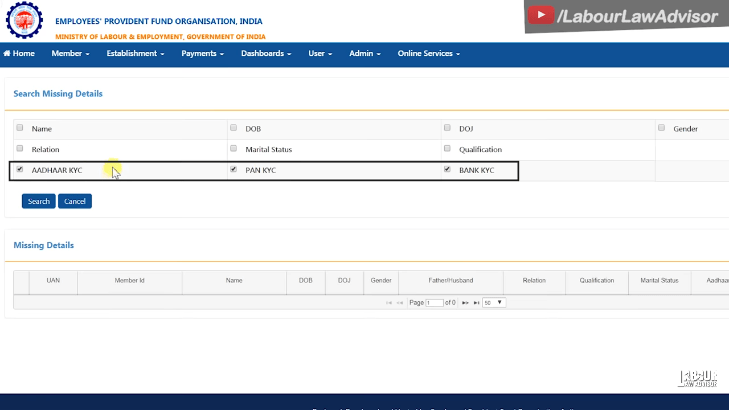
- Click on Search to view the list of all the employees whose details for Aadhaar, PAN and Bank KYC are missing from the PF portal.
- This list can be downloaded as well in an excel format by clicking on the excel icon given above the list.

Preparing text file for bulk KYC upload
- Go to Member option from menu bar and select KYC-BULK from drop-down list.
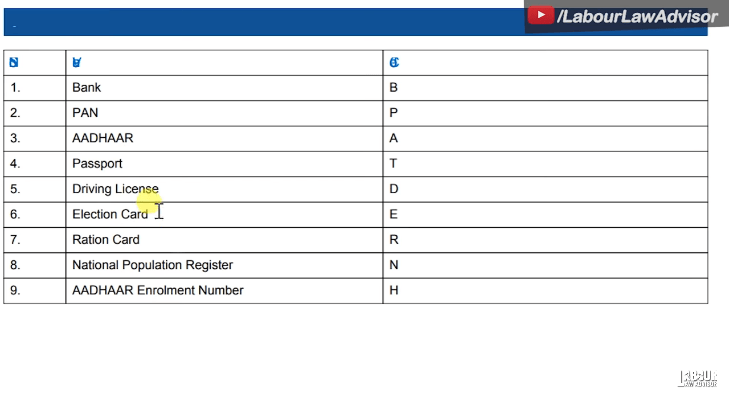
- Now click on Help File on right-hand side of the page.
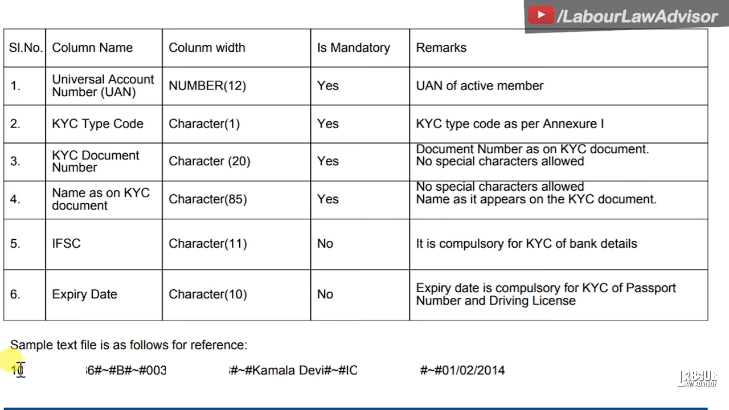
- The Help File details the missing information we can upload in bulk. These are – bank, PAN, Aadhaar, passport, driving license, election card, ration card, National Population Register and Aadhaar enrollment number. Additionally, each information has a specific alphabet assigned to it, which is the KYC type code.
- Now, each row of information in the bulk file must have six units as follows –
- 12 digit UAN
- 1 character KYC type code
- 20 characters KYC document number
- 85 characters Name as on KYC document
- 11 character IFSC code, if bank details are getting updated
- 10 character Expiry Date, if passport or driving license details are getting updated
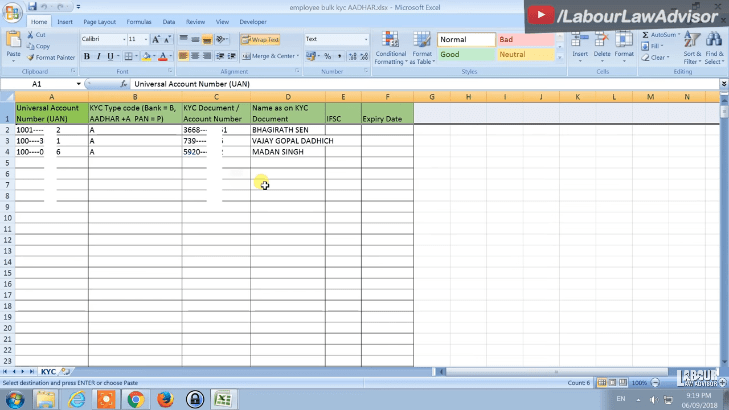
- To prepare this text file, open MS Excel on your computer.
- Create 6 columns as – UAN, KYC type code, KYC document/account number, Name as on KYC document, IFSC, and Expiry Date.
- Fill in all the details for upload, as one row per employee.
- Next, delete the first row with column headings.
- Go to File, then Save As and select CSV as Save as type. Click on Save.
- Go to page where the CSV document is saved. Right-click on document and select Notepad for Open With option.
- Now, go to Edit and select Replace.
- For Find What put comma (‘) and for Replace With put #~#. Then click on Replace All.
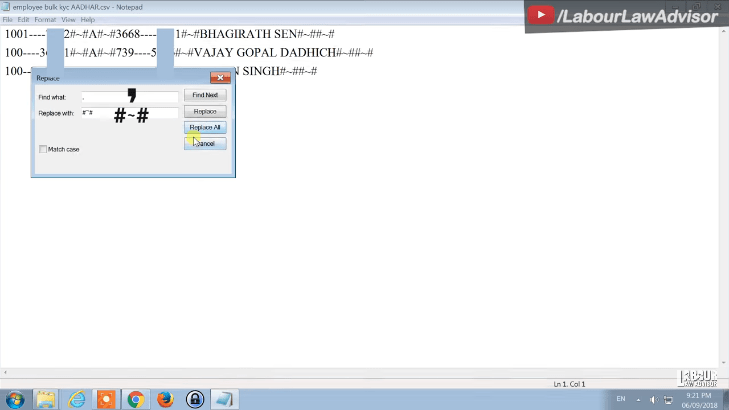
- This step will edit the file into the format as prescribed for bulk upload.
- Click on File, Save As and select TXT format for saving this document.
- Similarly, each KYC parameter file needs to be prepared separately with the KYC type code assigned for it.
Uploading bulk KYC file
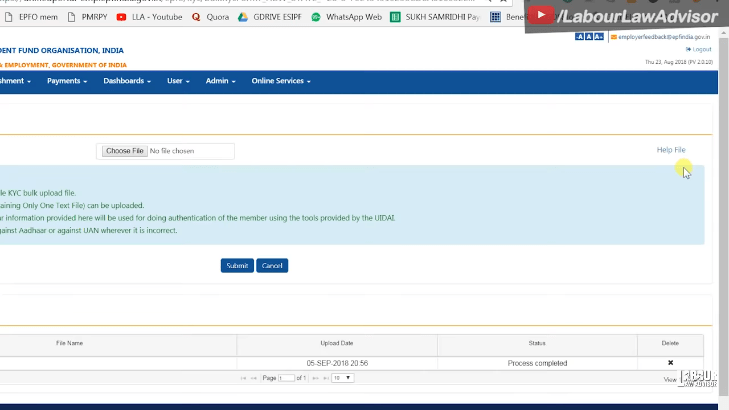
- Open PF member portal again and go to Member and KYC-Bulk option.
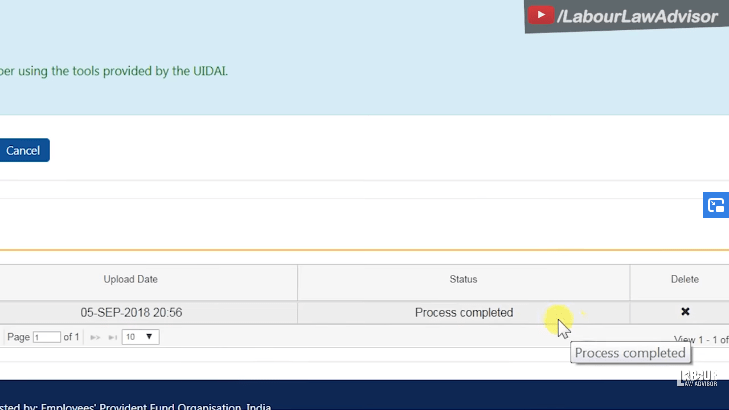
- Under Upload KYC File, click on Choose File. Now select the TXT file you prepared and click on Submit.
- If all details in the file are properly input, the file will get uploaded and Status will show as Process Completed.
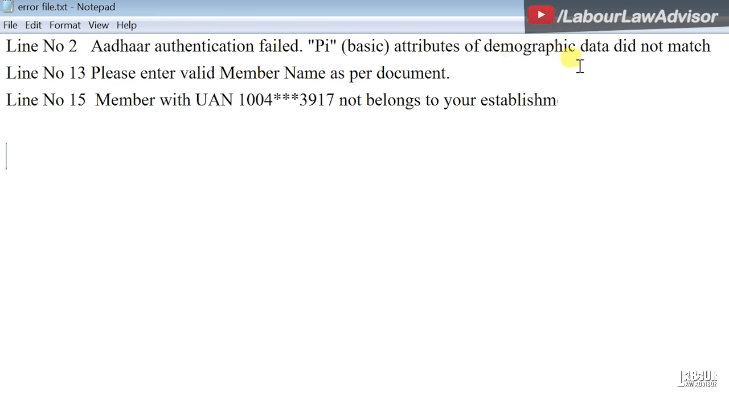
- But if the process shows incomplete with Error File then click on error file to view the errors in the data uploaded. Each error will be written against the row number. You need to correct the errors or delete those rows and reupload the TXT file.
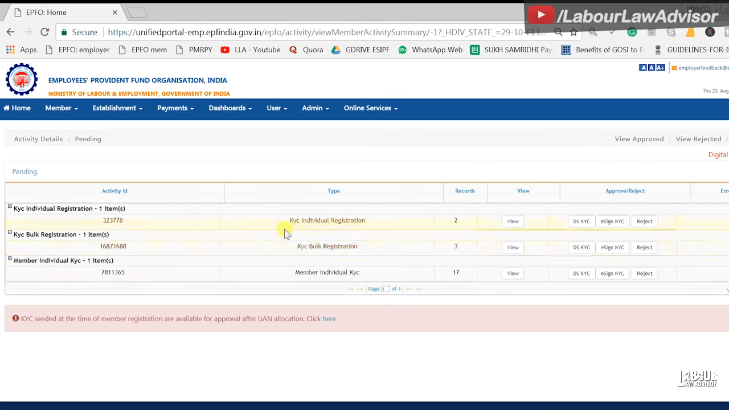
- Then go to Member and Approvals from drop-down list.
- This will list all the KYC you have uploaded which needs your employer approval. You have to approve each upload with your employer digital signature.
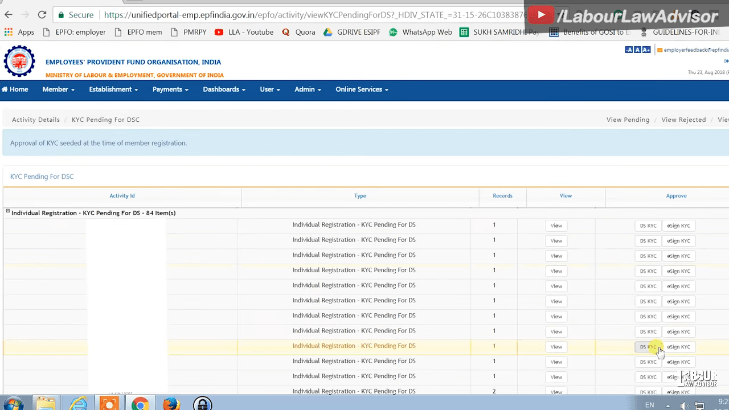
- Similarly, go to Member and Approve KYC Pending For DS.
- This will list all employee registrations which need your employer approval via digital signature.
Watch video below for the tutorial.
Join the LLA telegram group for frequent updates and documents.
Download the telegram group and search ‘Labour Law Advisor’ or follow the link – t.me/JoinLLA
It’s FREE!
